How To Assembly And Disassembly DENSO Common Rail Injector
.jpg)
As we know,common rail is the latest and advanced fuel system.It receives the fuel from the pump and distribute it to the injectors under extremely high pressure. The increase in the fuel pressure is a result of the latest engines' design.But what if the common rail injector has problem?Do you know how to disassembly and assembly?Today,BASCOLIN,a global pioneer of overall solution in diesel system,will share you some necessary steps to easily do the job.Below we will take DENSO injector for example.
How to disassemby DENSO common rail injectors?
1.Prepare the common rail injector filter disassembly and assembly tools
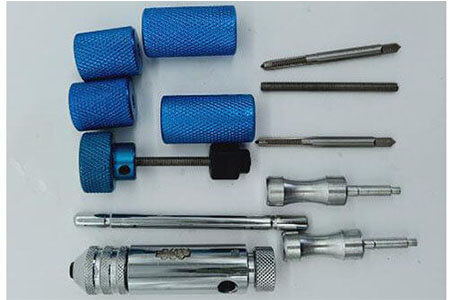
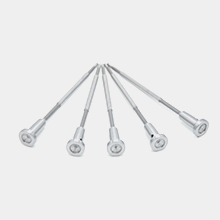
2.Prepare DENSO common rail injector disassembly and assembly tools
3.Fixed the injector in the bench clamp and tighten the handle of the vise
4.Put the cap nut on the injection nozzle
5.Loosen the cap nut with torque wrench
6.Remove nozzle tip,Intimedate discs,pressure rod,spring,return oil tray,spring spacer step by step
7.Loosen the handle of the vise
8.Remove the injector body,valve rod
9.Flip the injector and fixed in the bench clamp (vise)
10.Use a monkey wrench to loosen the electromagnet
11.Remove electromagnet
12.Remove valve spring
13.Remove valve spring washer
14.Remove armature generated gasket
15.Remove armature
16.Remove the fastening screw with a three-jaw tool and a torque wrench
17.Remove orifice plate valve
18.Remove locating pin
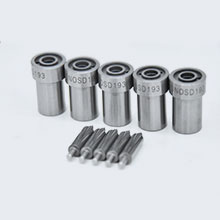
19.Use the filter disassembly tool to remove the filter
Because the inlet connector inside the high pressure fuel filter of DENSO injector has high filter accuracy,it's easy to blocking,so we need to replace the fuel filter during the maintenance.
20.Screw special tool,mount the dedicated screw tap
21.Turn the tap in the positive direction
22.Screw the tap into the inside of the filter.During tightening, please be careful not to exert too much force. If you exert too much force, the tap will break easily
23.Remove the tap when you screw to the bottom of the filter element
24.Remove the special tool
25.Screw in the special bolt
26.Tighten the bolts to tighten the nuts
27.Remove the bolt and the filter element will be removed automatically
28.Loosen the handle of the vise
29.Remove injector holder
30.DENSO injector disassembly done!
How to assembly denso common rail injector?
1.Fix injector holder in bench clamp
2.Tighten the handle of the vise
3.Install locating pin
4.Install orifice plate valve
5.Install fastening screw
6.Use the three-jaw tool and torque wrench to tighten the fastening screw
7.The torque is set to 40-50
8.Loosen the handle of the vise
9.Flip the injector and install valve rod
10.Install return oil tray
11.Install nozzle spring washer
12.Install nozzle spring
13.Install pressure rod
14.Install Intimedate discs,
15.Install nozzle
16.Install cap nut
17.Use a torque wrench to tighten,The torque is set to 40-50
18.Loosen the handle of the vise
19.Remove the injector
20.Prepare the zeroing tool and micrometer gauge
21.Place the instrument on the zeroing device
22.Press ZERO button to reset the instrument
23.Place the instrument in the electromagnet to measure armature lift
24.First, measure the distance between solenoid valve and shim as V1
25.Install armature
26.Install armature generated gasket
27.Place the instrument in the injector holder and measure the armature plane and the gasket as V2
28.Armature lift standard value:V2-V1=60(+/-10)
29.Remove armature generated gasket
30.Install spring valve washer into electromagnet solenoid
31.Install valve spring
32.Install armature generated gasket
33.Install electromagnet components
34.Fix injector in bench clamp
35.Tighten the electromagnet with a monkey wrench
36.Install filter
37.Use a special tool with a hammer to position the filter in place
38.Loosen the handle of the vise and remove injector
39.Assembly injector done!
.jpg)